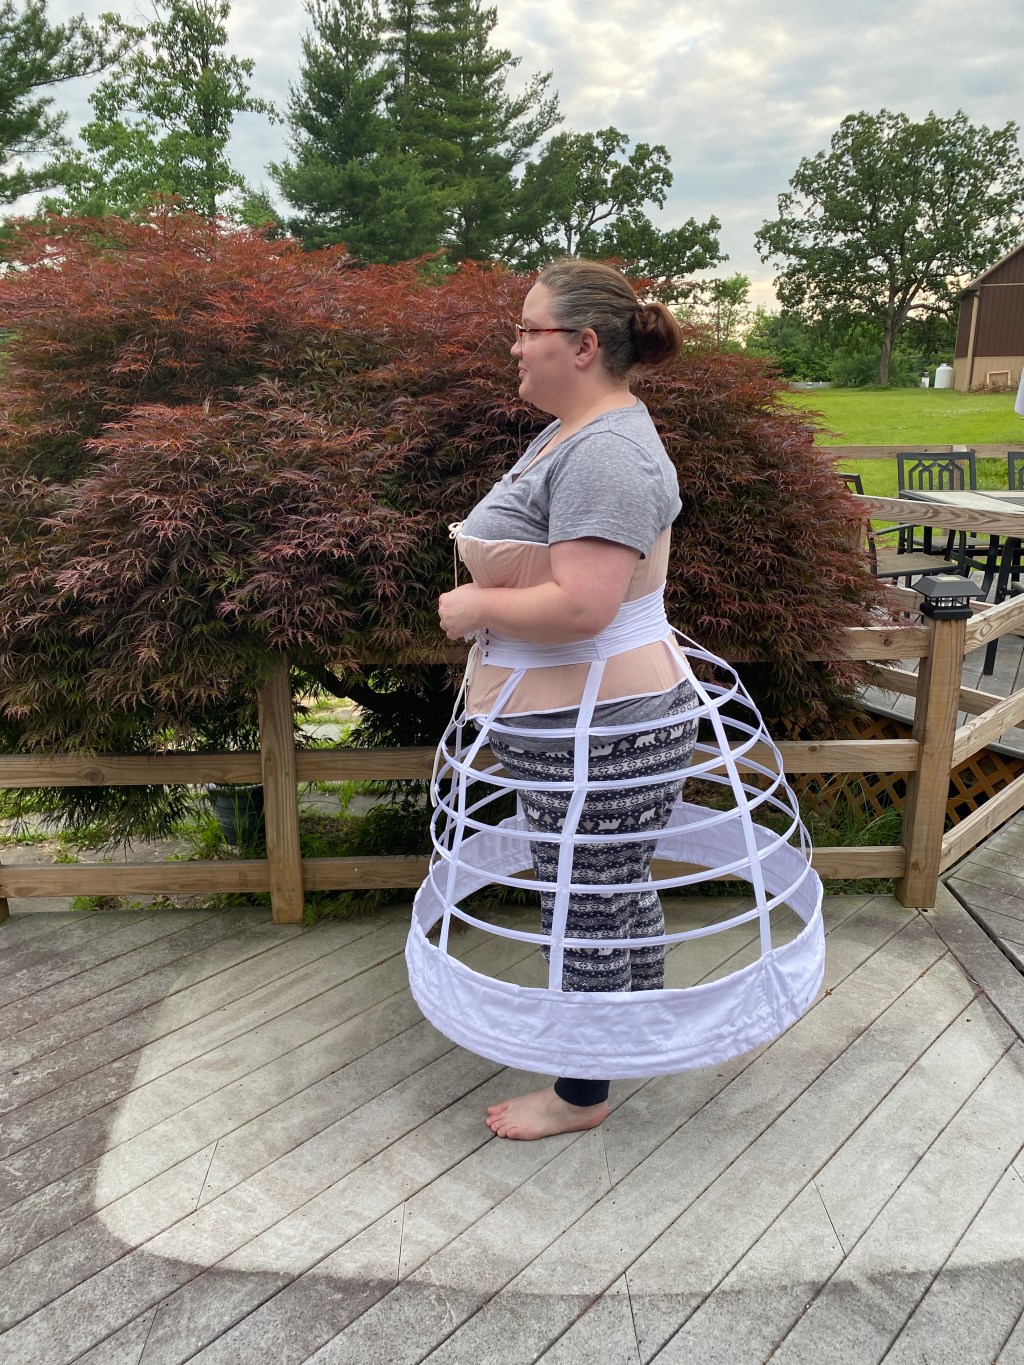
In preparation for an upcoming trip to Gettysburg this fall, I needed to make one critical undergarment – a cage crinoline. So fun! I’ve always wanted one! But also – WHAT A PAIN IN THE BUTT TO MAKE!!
Pattern used: Truly Victorian TV142 1856 Walking Cage Crinoline
Materials used: Hoop boning + casing (purchased from a now discontinued kit that Truly Victorian used to offer), quilting cotton thread, heavy buttonhole thread, 1″ cotton twill tape, 1/4″ wide steel bones, cotton broadcloth, size 00 grommets, ribbon for corselet lacing, duct tape.
Also of note: This youtube video was very helpful to me as a visual learner, so major props to the creator, Casey Renee Cosplay! She creates a crinoline from the same pattern, TV142, and helps break down the supplies needed (and the cost).
Construction notes: The challenge of making a crinoline was not that it was confusing. I actually found the measurements and instructions provided extremely concise and helpful, especially in conjunction with the Youtube video linked above. Truly Victorian’s instructions are not always beginner friendly, but in this case, I found them quite clear and helpful. Make sure you keep all of your casings/bones/tapes MARKED clearly (I used painters tape to write on and label these things – e.g. hoop 1, x” long) so you don’t mix them up. Staying extremely organized during the process is important. The challenge comes in that it’s tedious.
I opted to used heat erasable pens to mark all of the measurement notches/lines on the tapes and casings. I love that they don’t fade at all until you iron them away. Make sure you do a spot test if you use any kind of pen/marker/chalk so you can be sure it is removable when you’re done.
Having a second person (thanks to my husband, John!) was very helpful during the process of overlapping and securing the bones into hoop shapes. If working alone, you could probably do this with some strong clips or clamps to hold the overlapped boning together until it’s taped. I held the edges of the steel bones together, overlapped according to the instructions, while he wrapped around them 2-3x with duct tape. If you wrap around them TOO many times, the casing won’t fit back over it, so it might take a little fiddling to get the tape amount just right. You can always peel/cut excess off if it’s a little too thick for the casing to fit over.
Also, it’s extremely helpful to have a dress form or similar to support the crinoline while you pin all of the horizontal hoops to the vertical tapes! This gives you a great visual of any adjustments that need to be made.
It might be easier for some folks to hand tack each connection point between the hoop/vertical tapes on while *still* on a dress form – but I knew my back couldn’t handle that, and I ended up taking the whole thing off the dress form (all the connection points still pinned together) and tacked each “intersection” together while sitting on the couch. It took me a few tries to figure out how I want to stitch these connections together. I used heavy buttonhole thread, and ended up sort of whipping around each of the four “connection corners” a few times each. This was the most tedious part of the whole process, which left me with very sore fingers – I should have been more diligent about wearing a thimble!
I don’t remember there being instructions about what to do with the open ends of the bone casings in the center front of the crinoline. I just tacked the ends together (kind of sloppily) with buttonhole thread, and covered those ugly stitches with a small length of twill tape wrapped around it, and stitched together neatly at the back.

In the end, some small mistakes were made. As you can tell from the photo, there were some tiny mis-measurements made by me with the placement of connection points. However, once a petticoat is on? The shape is still perfect and exactly what it needs to be. It’s certainly not enough of an error for me to unpick the stitches. I probably should have gone with one larger size of the cincher/waist band, but it all still works wonderfully.
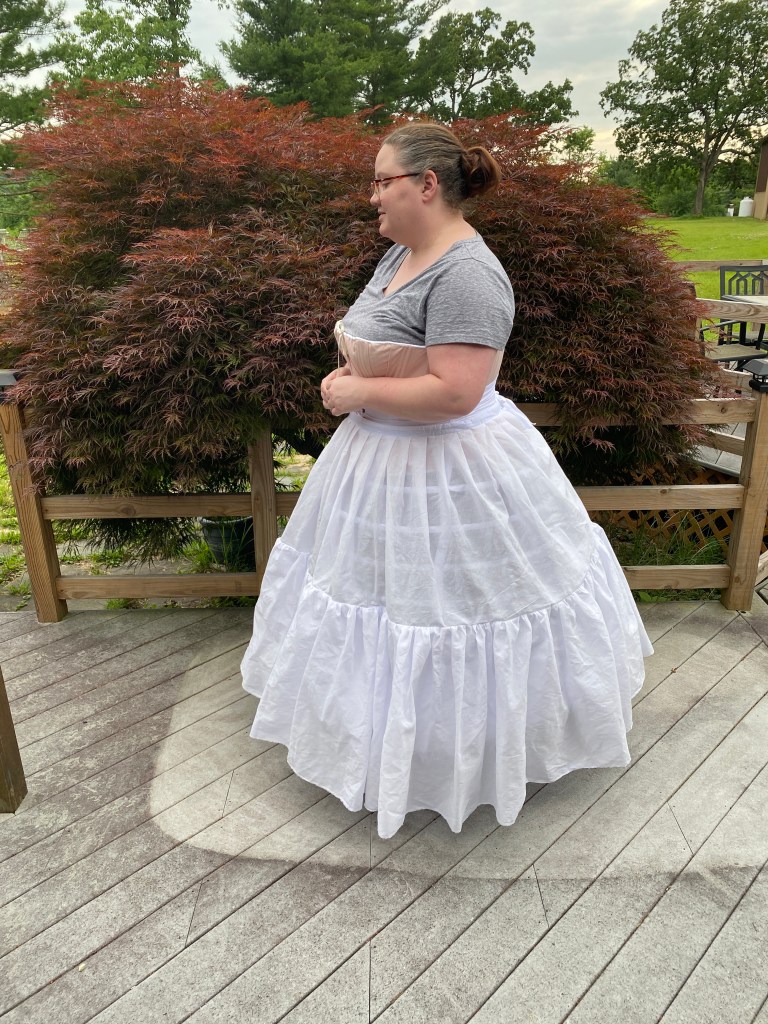
For the petticoat, I used TV’s free petticoat diagram. I did not have or use eyelet fabric as suggested in the diagram, I just used a 44″ wide, 7.5 yard long piece of cotton organdy that I got on mega-clearance at Fabric Mart’s retail store. It was the perfect amount for this project, the and the stiffness of the organdy smooths out all of the hoop lines wonderfully.
Overall, I definitely recommend this pattern. I don’t have any desire to make a crinoline EVER again, but if I did, I’d go with Truly Victorian’s patterns.

Leave a comment