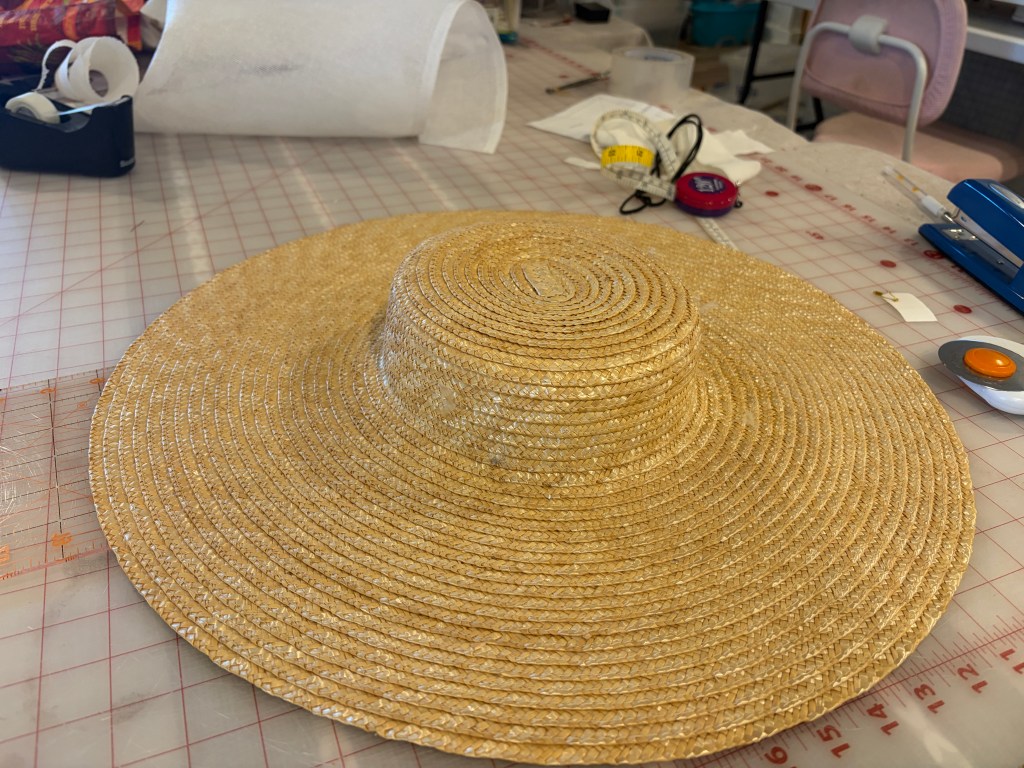
I have been wanting a big late 18th century straw hat to wear on top of my big 1780s/90’s hedgehog hair – big hair demands big hats! I picked up a straw hat blank at a costumer’s yard sale last year because it had the deeper crown style I was looking for compared to most available bergère blanks. I LOVE shallow crowned bergère hats, but we definitely see this style with a bit of a taller crown in the 1780’s/90’s.
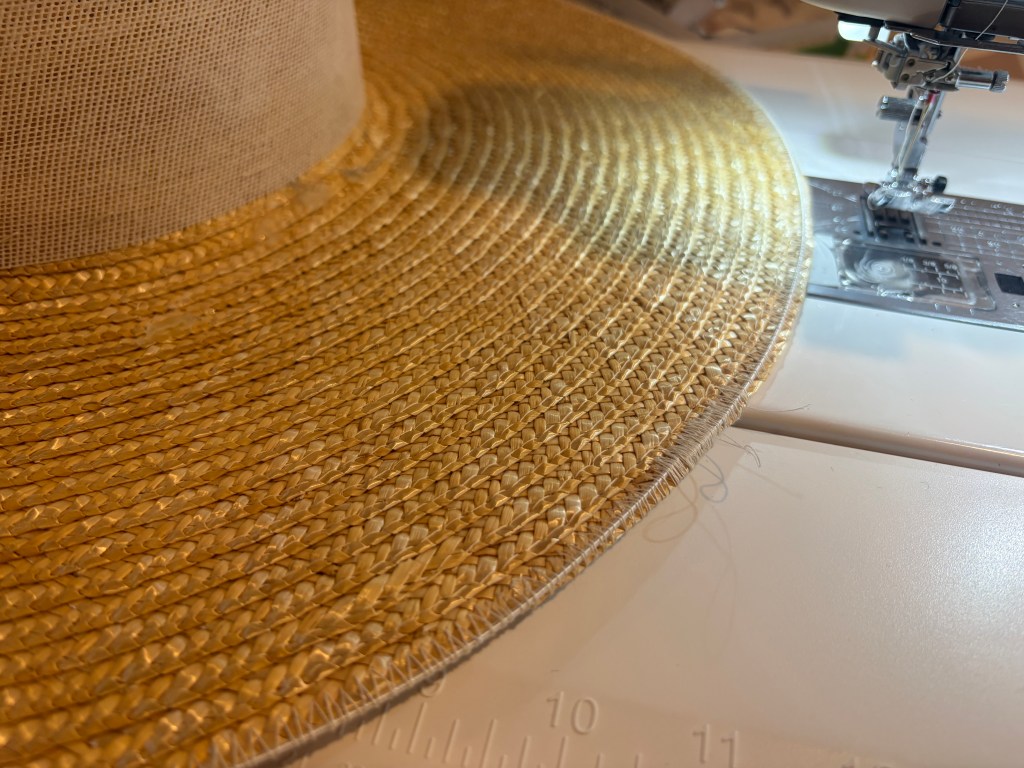
The hat I purchased was already beautifully trimmed by the previous owner, but the first thing I did was carefully remove the existing trims to add back into my sewing stash. Pictured below is the hat blank I started with – please ignore my messy work table! 😉
I really like the straw hat from Vigée le Brun’s portrait of Comtesse de la Châtre from 1789, so I decided to use that one as decor inspiration.

Comtesse de la Châtre (Marie Louise Perrette Aglaé Bontemps, 1762–1848), Later Marquise de Jaucourt, 1789
Oil on canvas; 45 x 34 1/2 in. (114.3 x 87.6 cm)
The Metropolitan Museum of Art, New York, Gift of Jessie Woolworth Donahue, 1954 (54.182)
http://www.metmuseum.org/Collections/search-the-collections/437900
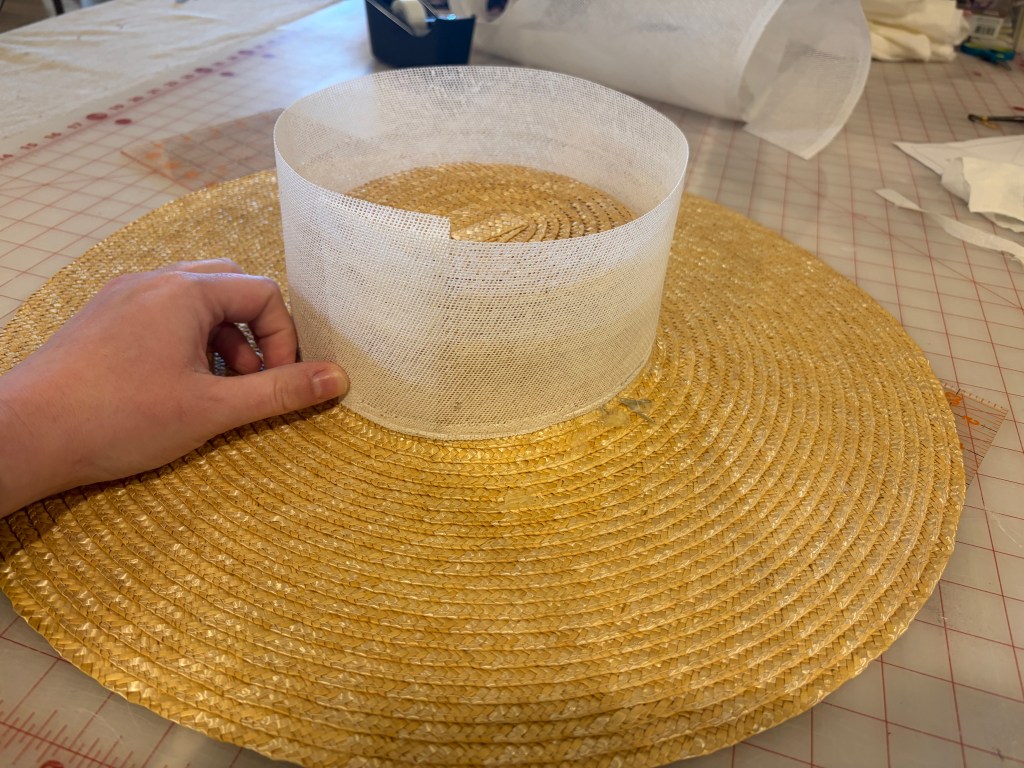
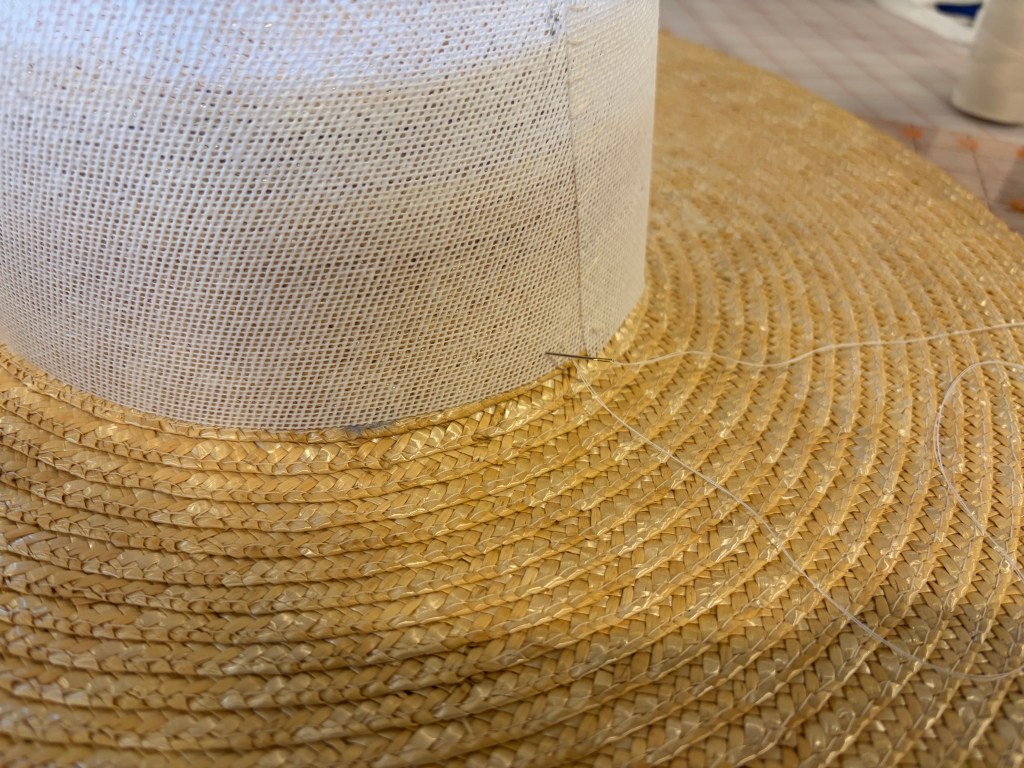
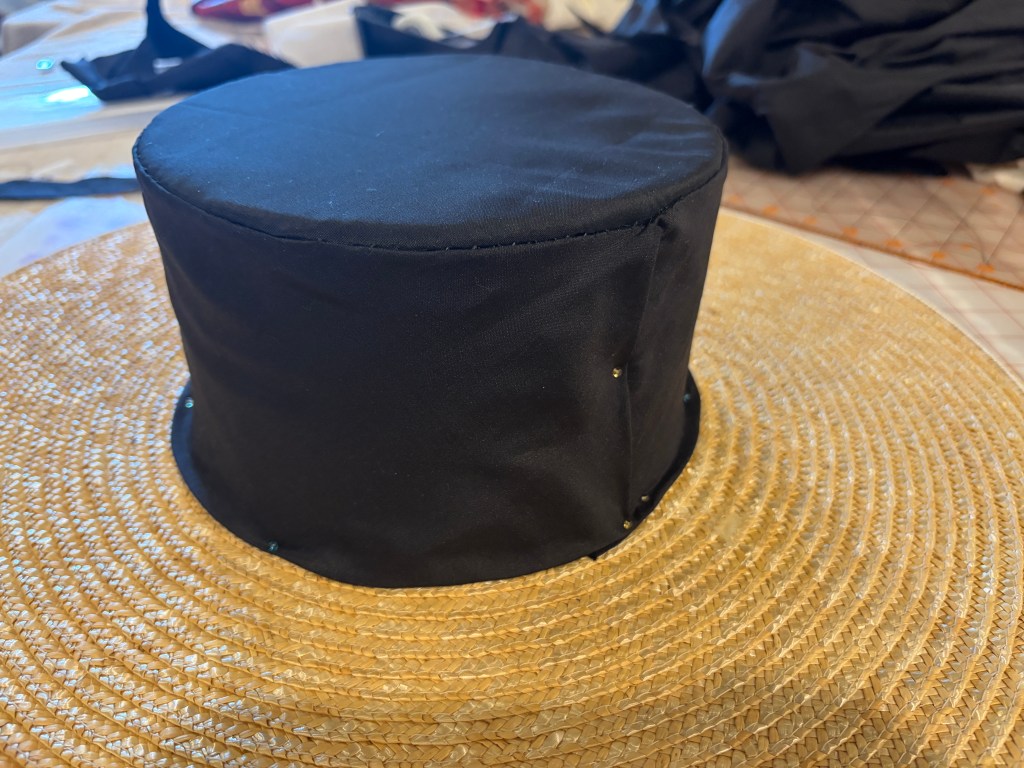
I debated whether or not I wanted to try and reshape/block the crown to be taller like the one in the portrait, but decided that it might actually be easier to just build a taller buckram crown around the existing one. I cut out a 5″ tall rectangle of buckram. The width was the circumference of the straw crown, plus a couple extra inches for overlap, wrapped around the existing straw crown into a cylinder shape, and stitched the overlapped edges together. I think my finished crown size piece was about 5″x25″. Make sure you like the size of this new crown piece on your straw hat blank, and even out the edges if needed.
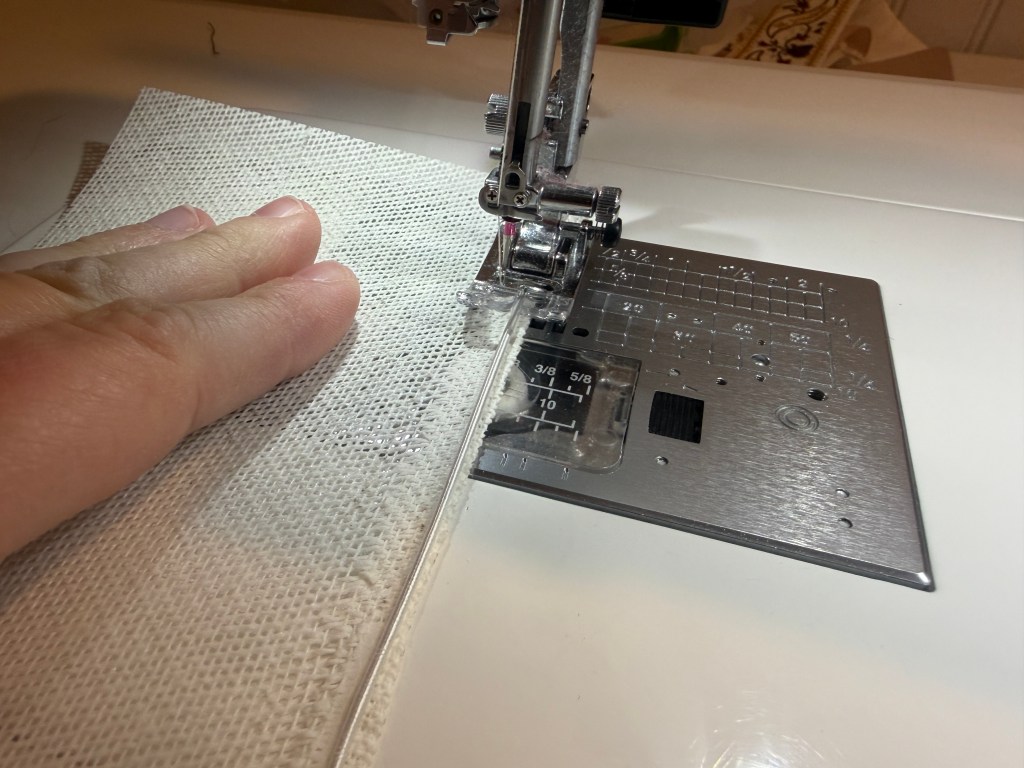
I used my sewing machine to carefully zig-zag stitch a length of millinery wire to the top of the new buckram crown side, making sure to leave an extra inch of wire on each edge to overlap.
While temporarily pinning the crown side to the existing straw crown, I used some sewing clips to secure the wire where the edges overlap, and whip stitched the excess wire securely together.
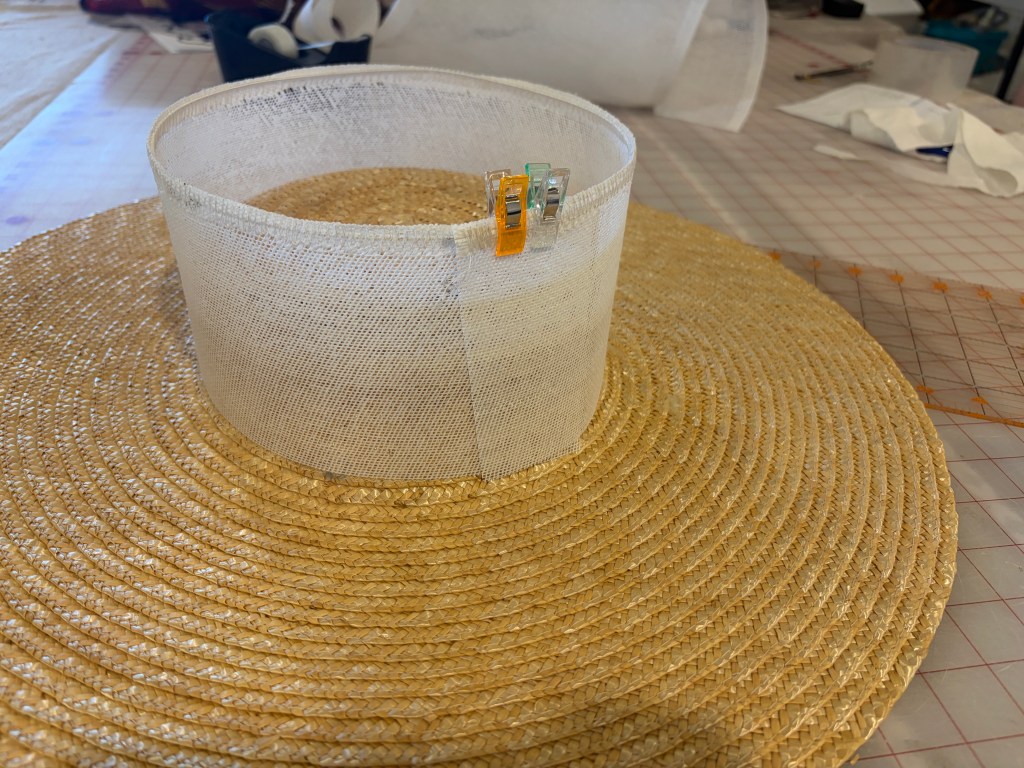
I then hand stitched both the overlapped edges together, and the base of the new buckram “cylinder” to the straw crown to secure it to the hat.
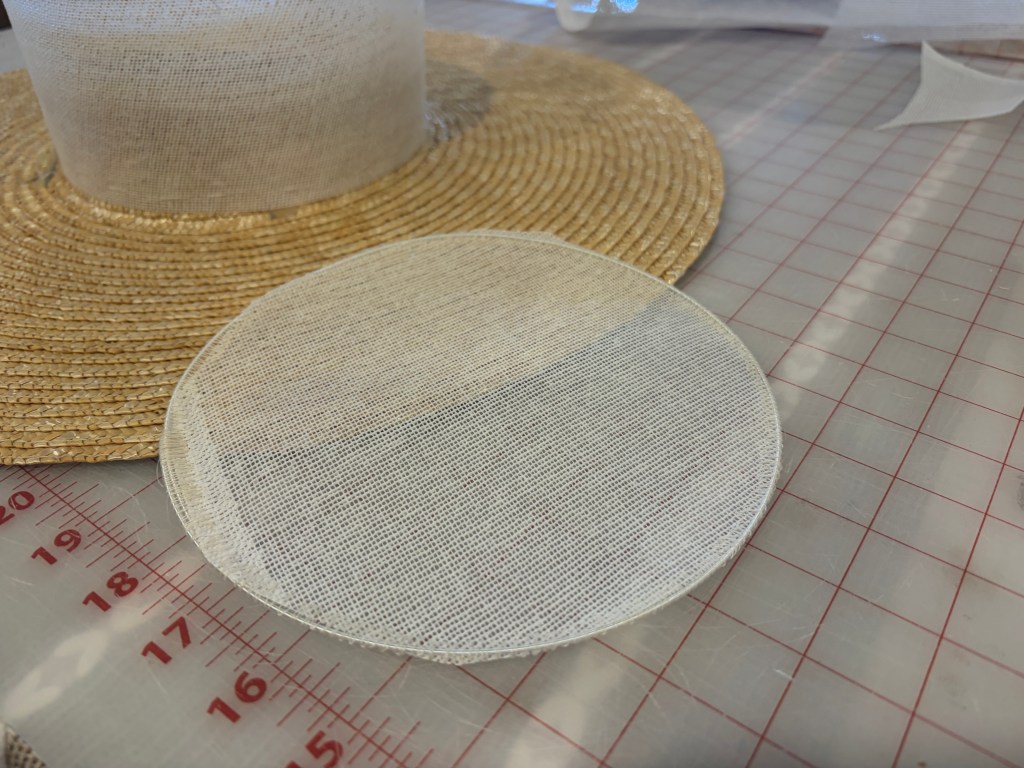
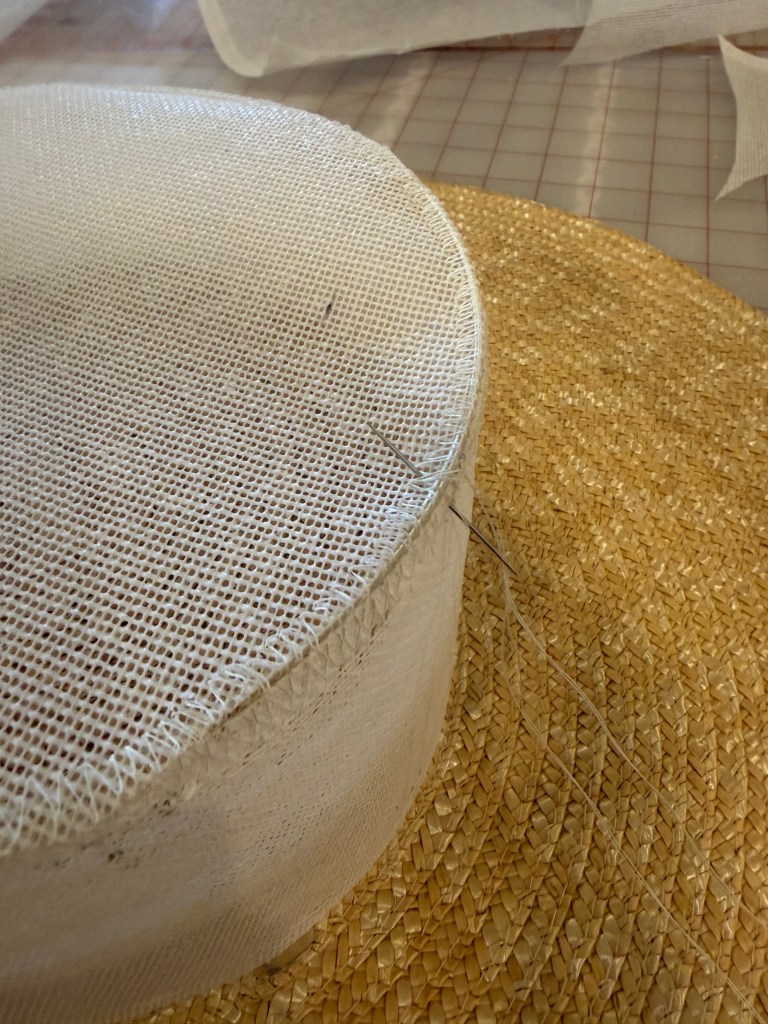
I then laid a small piece of buckram on top of the wired crown sides to cut a new crown tip. After cutting the new round crown tip, I zig-zag stitched a circle of millinery wire to those edges (making sure there was a small overlap in the wire), and whip-stitched the buckram crown tip to the buckram crown sides. I hope this makes sense with the attached pictures!
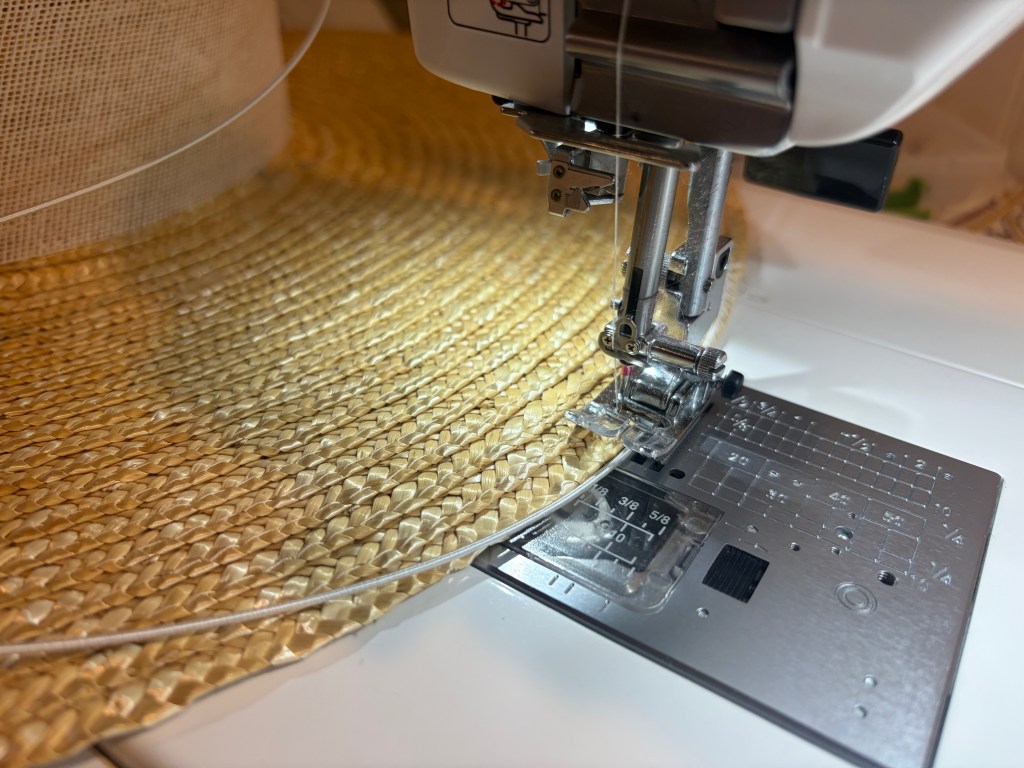
I wanted to be able to adjust the shape of the brim as desired, so I zig-zag stitched a length of millinery wire around the brim edge of the straw hat (overlapping the wire a couple inches where it meets at the ends). This would be covered by ribbon binding later.
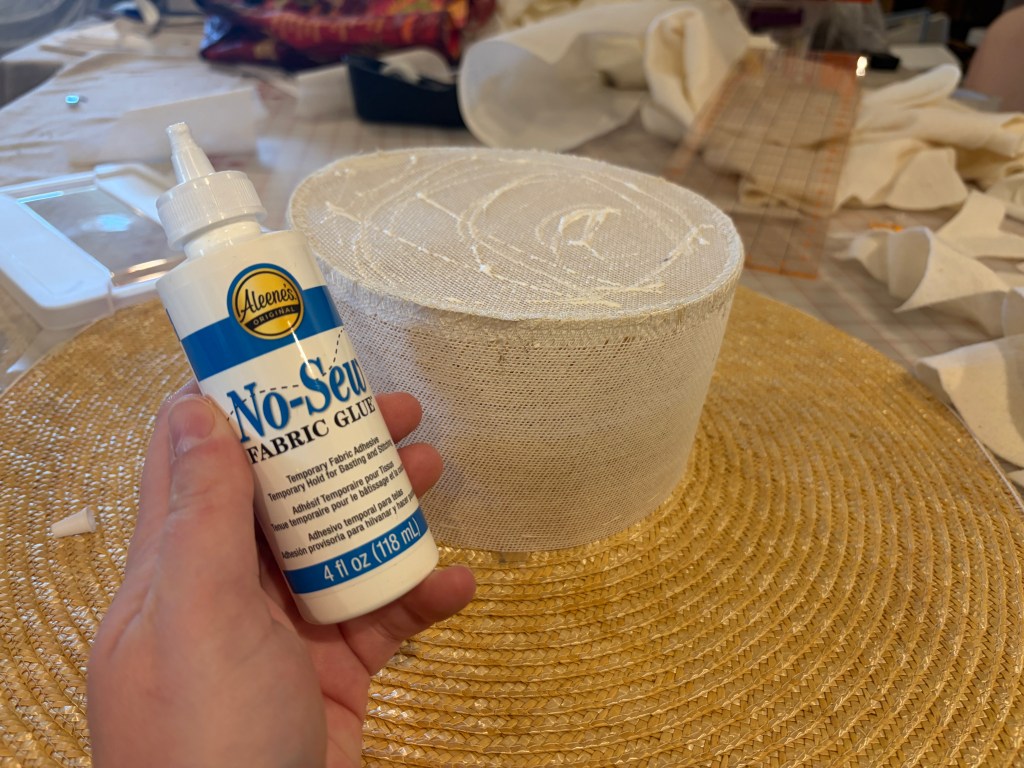
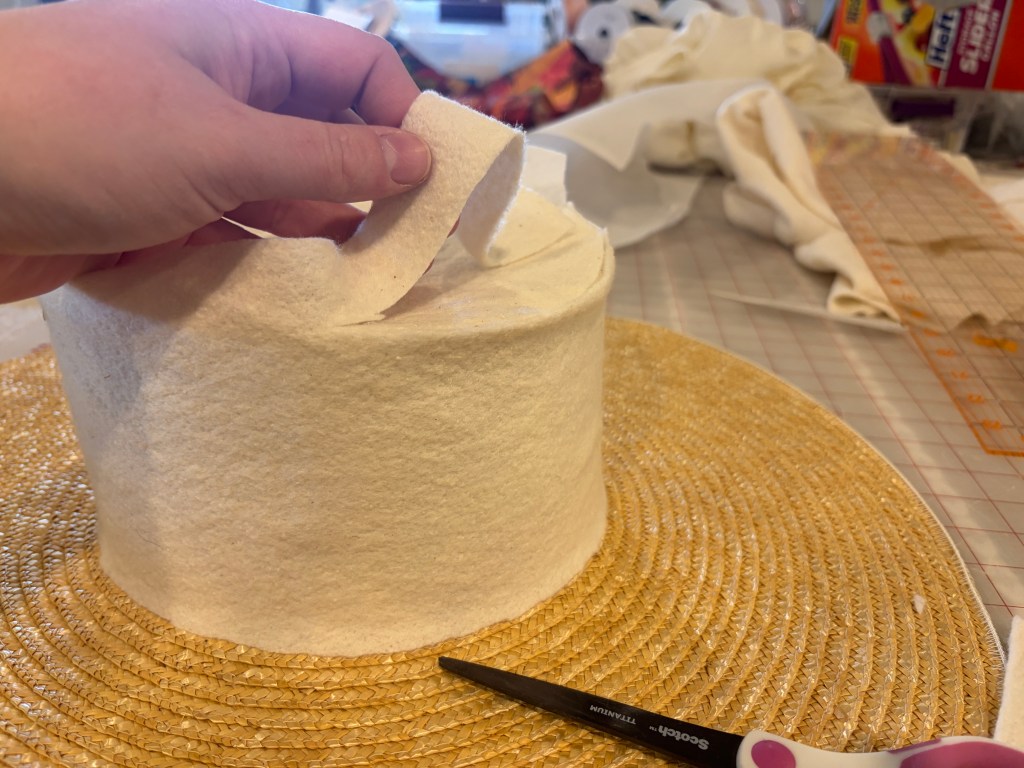
For the mull pieces, I used a very thin cotton quilt batting material. Cut the pieces out about the same size as the crown sides and tip pieces – you don’t need any seam allowance or overlap on the mull pieces, since you will want to reduce bulk during this step. I used a very light layer of Aleen’s no-sew temporary fabric glue to adhere the mulling). Don’t use too much glue, as it can soften and warp the buckram.
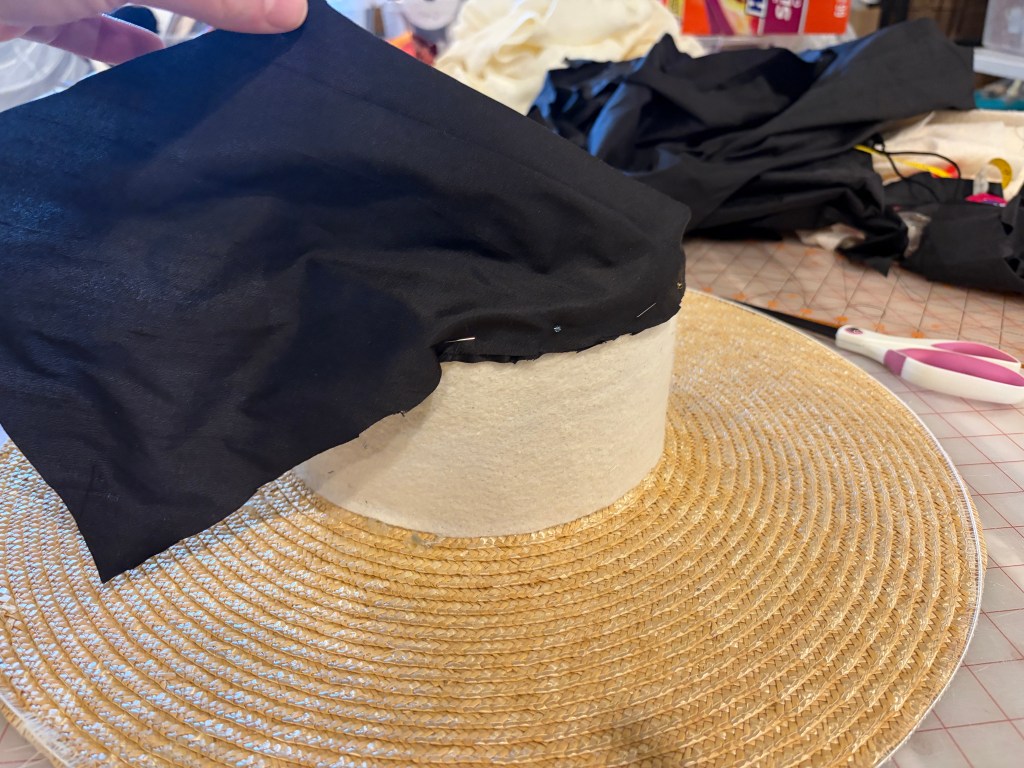
I used some black silk shantung from my fabric stash to cover the crown tip and sides – you’ll cut these around the same dimensions as the crown sides and crown tip (you’ll have a rectangle piece and a circle piece), but make sure to add seam allowance on all sides! I added a bit more than necessary, but I’d rather have extra fabric to trim away instead of too little to work with. I also highly recommend that you cut the rectangle piece for the crown side on the BIAS – this makes it much easier to get a very smooth effect.
I stretch the round piece of silk for the crown tip piece over the mulled crown, and pin in place. I used a curved needle to stitch this in place just over the edges. You can trim away some excess fabric if needed after this step.

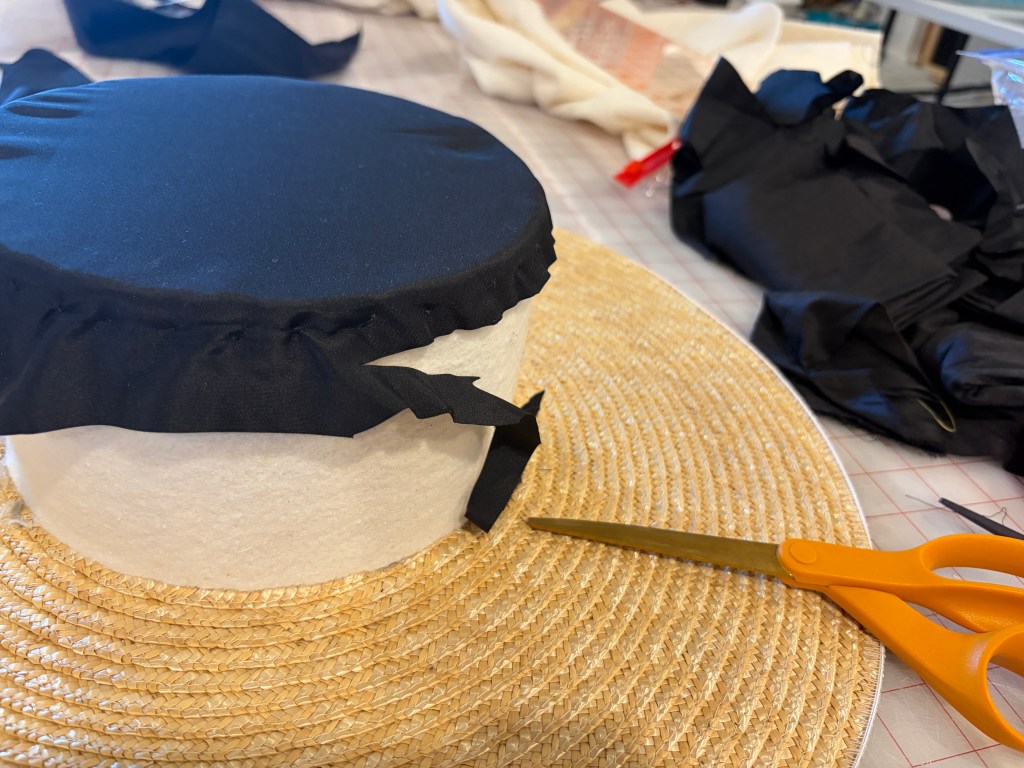
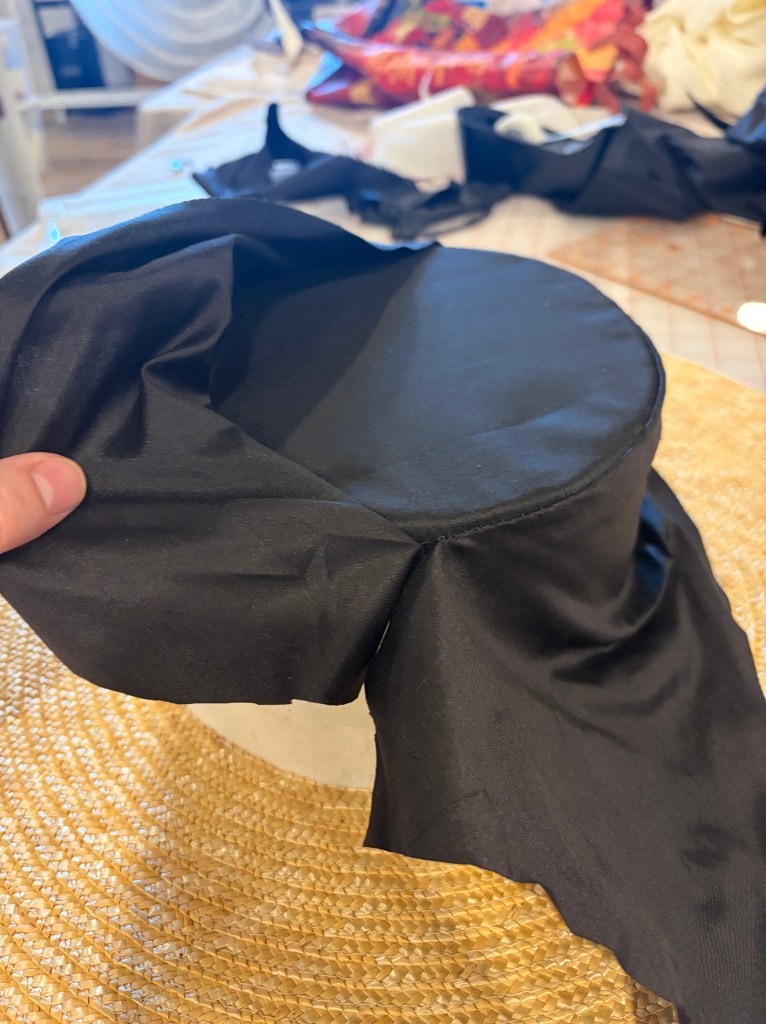
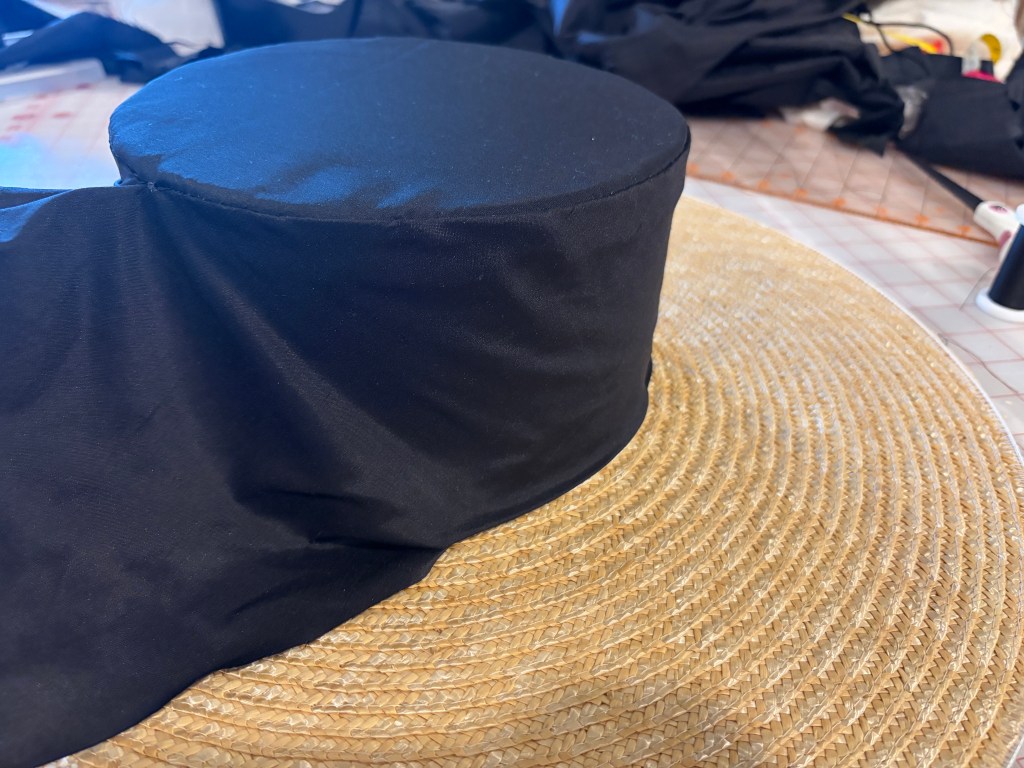
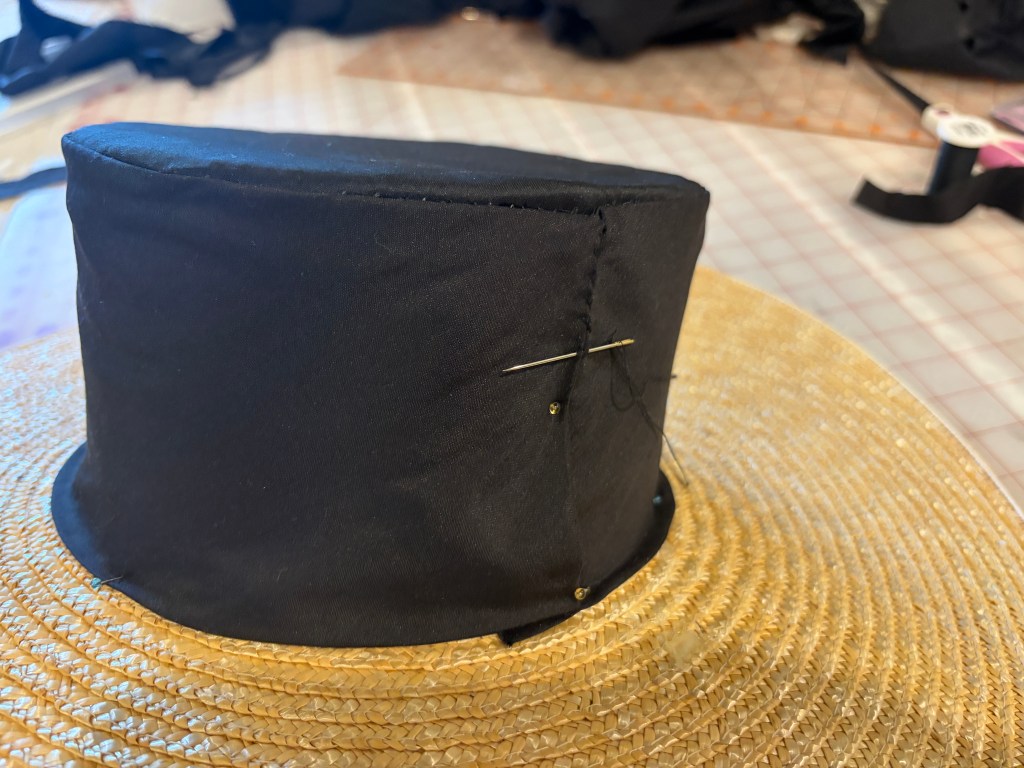
For the crown side silk piece, I stitched the top edge of the crown side fabric to the top edge of the crown – right sides together. I hope this makes sense with the attached pictures.
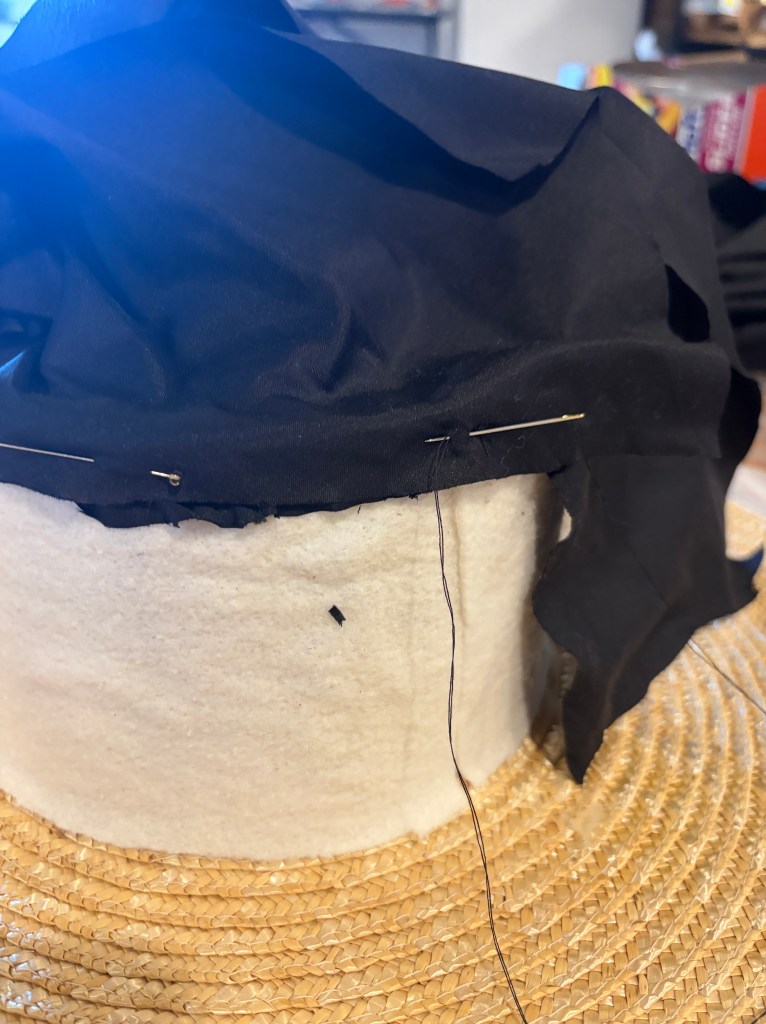
Leave an inch or so of fabric available overlap at the edges later. Once you’ve stitched it on around the whole edge, you can pull the crown side fabric down and smooth it out over the crown side base. Turn the bottom seam allowance under, and stitch onto the crown base to secure.
If you plan to cover the base of the crown with trim later, then you don’t need these to be neat or pretty stitches (mine were terrible, LOL).
Overlap the short/vertical edges of the crown side fabric, and turn the seam allowance under of the top edge – whip stitch into place. I consider this the center back point of the hat crown now.
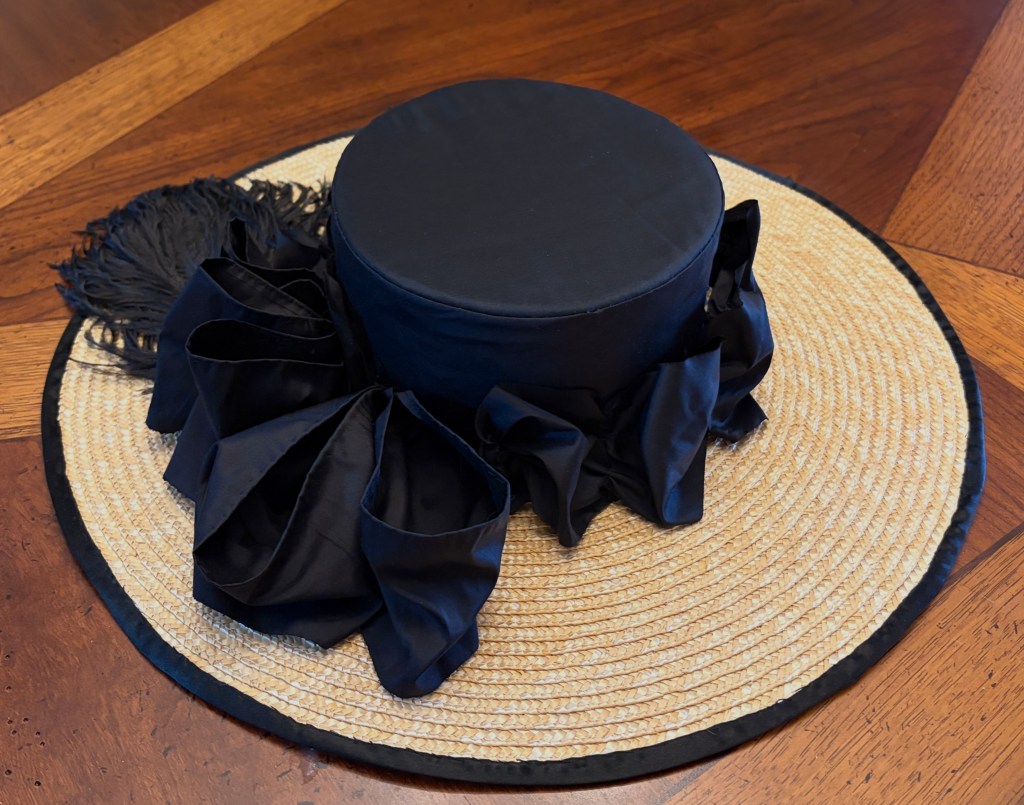
I used a 7/8″ black silk satin ribbon to bind the edges. While the binding I created is narrower than what is pictured in the portrait, it was a bit easier to apply (in my opinion) than a very wide width. I’ll be honest, binding the brim edges on a straw hat is my least favorite step – but I managed to do it! No pictures of this step, because I was cursing too much.
Now, your new hat base is ready to decorate! I made some very large puffs from a wide strip of silk to place around the base of the crown – this was partly to cover my sloppy stitches at the crown base. To mimic the voluminous ribbon loops seen in the portrait, I used a combination of on-grain (quickly hemmed) and bias cut silk strips to fold together into big loops, and tacked those onto the crown with some thread. I also added a medium sized fluffy ostrich feather. There are many hat decor ideas to be found in 18th century portraits!

Leave a comment